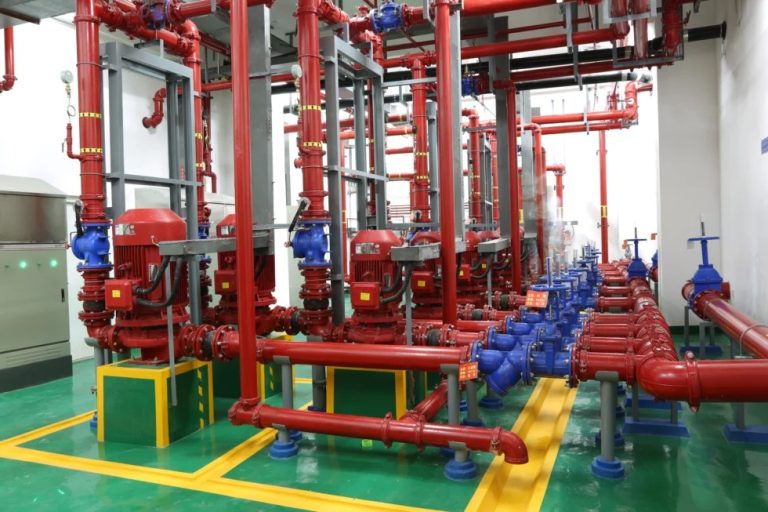
Picture this. It’s a quiet night in a bustling warehouse. Suddenly, alarms blare. A small fire breaks out. The sprinklers kick in. Water rushes through the pipes. But what if backflow contaminates the system? Or pressure drops because a valve’s acting up? That’s where check valves come in. Those unsung heroes keep things flowing one way in fire protection setups. If you’re in building maintenance, facility management, or just handling fire safety for your property, getting a handle on how to test and maintain check valves isn’t just smart. It’s a game-changer. It keeps your system ready to roll. In this post, we’ll dive deep into the nuts and bolts. We’ll share real-world tips drawn from years in the field. Yeah, I’ve seen systems fail over something as simple as a stuck disc. And trust me, you don’t want that headache.
Understanding Check Valves in Fire Protection Systems
First off, let’s get clear on what we’re dealing with. Check valves are basically one-way gates in your piping. They let water or other fluids pass in one direction. But they slam shut if things try to flow backward. In fire systems, they’re crucial. They stop contaminated water from backing up into the clean supply. Or they prevent pressure loss that could hobble your sprinklers during an emergency.
Types of Check Valves Commonly Used
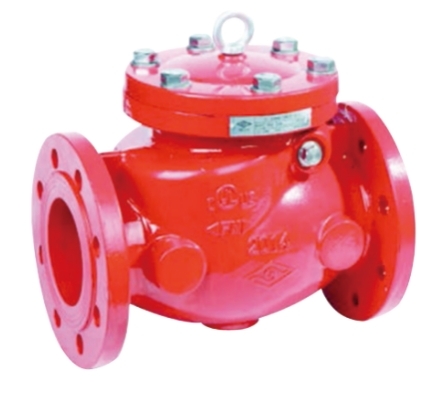
Not all check valves are created equal. Picking the right one depends on your setup. Swing check valves, for instance, use a hinged disc. It swings open with forward flow. They’re simple and reliable for larger pipes. Then you’ve got lift check valves. There, a piston or disc lifts up. These handle higher pressures well. But they might need more headroom. And don’t forget inline or spring-loaded ones. They snap shut fast thanks to a spring. That’s great for systems with fluctuating pressures.
In fire protection, these often meet standards like those from FM or UL. They ensure the valves can take the heat. Literally, up to around 650°F in some cases. Sizes? They range from 1 inch up to 12 inches or more. Pressure ratings hit 300 PSI typically. But hey, always check your system’s specs. I’ve had jobs where a mismatched valve caused more trouble than it solved. One time, in an old factory, we swapped out a swing type for a lift one. It fixed the pressure issues right away. But only after a full day of testing.
Why Proper Functioning is Non-Negotiable
Think about it. A faulty check valve could lead to dry pipes filling with air. Or worse, backflow pulling in debris. According to industry reports, something like 20% of fire system failures trace back to valve issues. That’s not just stats. It’s real buildings at risk. Maintaining them keeps your whole setup humming. It cuts down on downtime. And it potentially saves lives. Plus, regular checks can spot wear before it bites you. Like corrosion from hard water. I’ve seen that eat through valves in older industrial spots. In one warehouse down south, the water was so mineral-heavy it turned the insides to rust in under two years. We caught it during a routine inspection. Dodged a bullet there.
Step-by-Step Testing Procedures
Testing isn’t rocket science. But it does take a methodical approach. Grab your tools. A pressure gauge, maybe a flow meter. And let’s walk through it. Safety first. Isolate the section. Drain if needed. And wear your PPE. I’ve skipped gloves once. Regretted it when a valve popped unexpectedly. Water everywhere. Not fun.
Visual and Physical Inspection
Start simple. Look over the valve body for cracks, leaks, or rust. Feel for loose bolts or fittings. In a fire system, check the inlet and outlet for blockages. Debris loves to hide there.
- Examine the exterior:Scan for dents or corrosion. If it’s galvanized, like many in humid environments, watch for white powdery buildup. That stuff builds up quick in coastal areas.
- Check seals and gaskets:These wear out over time. A quick poke with a tool can reveal if they’re brittle. Sometimes, they’re fine on the outside but shot underneath.
- Inspect installation:Is it oriented right? Flow arrow pointing the correct way? I’ve fixed systems where valves were installed backward. Rookie mistake. But it happens more than you’d think.
If something looks off, note it down. Documentation’s key for compliance. It also helps when you look back later. Like, “Hey, remember that loose bolt last year? Glad we tightened it.”
Operational and Pressure Testing
Now, get hands-on. For a basic test, pressurize the system. And watch for backflow.
- Forward flow test:Open downstream valves. Measure flow rate. It should be smooth. No chatter. Aim for design specs. Say, 10-20 GPM depending on size. In bigger systems, you might hit higher.
- Backflow prevention check:Apply reverse pressure. Use a pump if needed. Ensure no leakage. Zero tolerance here. Even a drip means trouble. I’ve seen tiny leaks turn into floods during drills.
- Cycle the valve:Open and close it a few times manually if possible. Listen for unusual noises. Like grinding. That could signal a jammed disc. Or maybe worn hinges.
Use a table like this for quick reference on pressure thresholds:
| Valve Size (inches) | Max Working Pressure (PSI) | Test Pressure (PSI) |
| 2-4 | 175-300 | 200-350 |
| 6-8 | 150-250 | 175-300 |
| 10+ | 125-200 | 150-250 |
These are ballpark figures based on common ASTM standards. Your model’s data sheet rules. Always double-check that paperwork. It’s saved me headaches more times than I can count.
Advanced Flow and Leak Detection
For deeper dives, hook up a flow meter. In one warehouse gig I recall, we found a check valve only allowing 70% flow. Due to scale buildup. Testing caught it before a drill turned embarrassing. If your system’s got alarms tied in, test those too. Leak detection? Hydrostatic testing at 1.5 times operating pressure for 2 hours is standard. No drop? Good to go. But if there’s even a slight dip, investigate. Could be a hairline crack. Or a bad seal. We once traced a slow leak to a factory defect. Had to pull the whole valve. Painful, but necessary.
And while we’re on testing, consider environmental factors. In hot climates, heat can warp parts. In cold ones, freezing’s a risk. I’ve dealt with both. Up north, we add antifreeze mixes sometimes. Down here in warmer spots, it’s more about UV damage on exposed lines.
Best Practices for Maintenance
Maintenance isn’t a one-and-done. It’s ongoing. Set a schedule. Monthly visuals. Quarterly tests. Annual overhauls. But tailor it. High-use systems in dusty factories need more TLC than office setups. For example, in a manufacturing plant with constant vibrations, check monthly. Vibrations loosen things fast.
Routine Cleaning and Lubrication
Dirt’s the enemy. Flush the system periodically. That clears sediment. For moving parts, a light lubricant on hinges or springs keeps things smooth. Avoid overdoing it, though. Or you’ll attract more grime. It’s a balance.
- Flush annually:Run water through to dislodge particles. Do it more if your water’s dirty. Like in areas with old municipal lines.
- Lubricate sparingly:Use food-grade stuff if near potable lines. Nobody wants contamination.
- Replace parts proactively:Seals every 5 years. Or sooner in harsh conditions. Don’t wait for failure.
I’ve seen valves last 20 years with good care. But neglect one winter and bam. Frozen solid. Happened to a buddy of mine on a job site. Cost them a full replacement.
Troubleshooting Common Problems
Stuff happens. If the valve chatters, it might be undersized for the flow. Check calculations. Leaks? Tighten connections. Or replace O-rings. Stuck open? Could be debris. Disassemble and clean. In a hotel fire system once, we traced intermittent failures to vibration from nearby pumps. Added supports. Problem solved.
Here’s a quick rundown of common issues and fixes:
- Chattering or noise:Often from turbulent flow. Resize or add dampeners.
- Leaks at joints:Check torque on bolts. Sometimes, it’s just settling over time.
- Failure to close:Debris or worn springs. Clean or replace.
- Corrosion buildup:Switch to better materials if recurring. Like stainless in salty air.
And a side note: Weather plays a role. Outdoor valves in cold climates? Insulate them. I remember a job in the Midwest where freeze-thaw cycles cracked a valve body. Lesson learned. We wrapped everything after that. No more issues.
Tools and Equipment You’ll Need
Don’t skimp here. A good pressure tester. Multimeter for any electrical ties. And basic wrenches. For pros, ultrasonic leak detectors are gold. They spot issues without disassembly. I’ve used one to find pinhole leaks in buried lines. Saved digging up the whole yard. Also, keep a logbook handy. Track every test. It helps spot patterns over time. Like, if failures spike in summer, maybe heat’s the culprit.
Oh, and one more thing—training. Make sure your team knows this stuff. I’ve been on sites where new guys skipped steps. Led to false positives in tests. Not good.
Introducing Fluid Tech Group: Your Trusted Check Valves Supplier
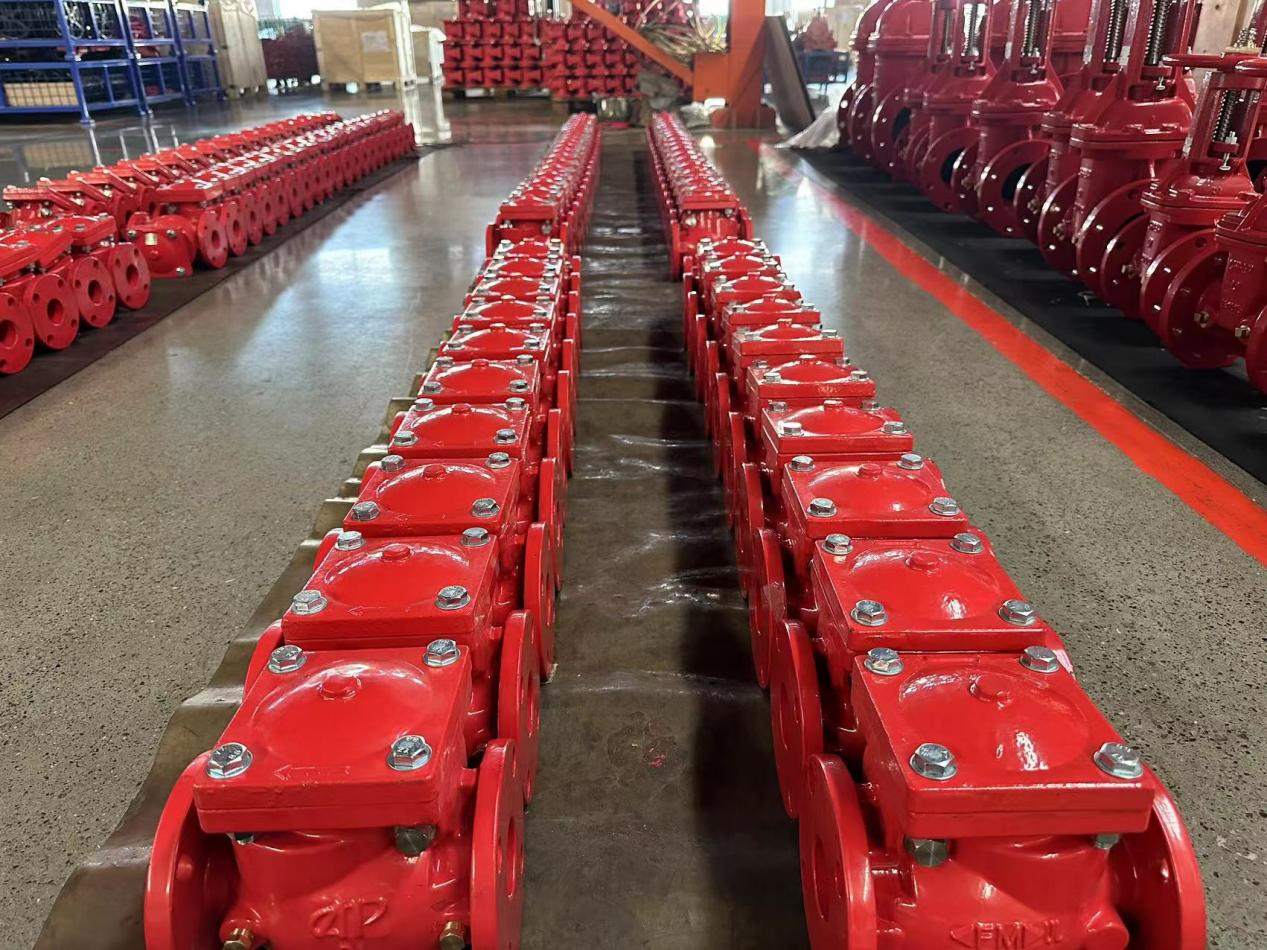
Speaking of reliable gear, let’s talk about Fluid Tech Group. These folks kicked off in northern China back in 2018. They teamed up with top foundries to crank out fire protection essentials. Including fire valves like check valves that meet tough standards. Think FM approved and UL listed. Their warehouses in key logistics spots mean quick delivery. And they’ve got certifications galore: ISO, SGS, TUV. What stands out? Their focus on quality from raw materials to shipment. With inspections at every step. If you’re sourcing check valves for your fire setup, they’re a solid bet. For durable, certified products that hold up under pressure. No fluff. Just dependable stuff. It helps keep systems performing at their best. I’ve recommended them to a few colleagues. Never heard complaints.
Conclusion
Wrapping it up, nailing how to test and maintain check valves boils down to regular checks. Smart troubleshooting. And using quality parts. It keeps your fire system sharp. Ready for whatever comes. Skip it, and you’re rolling the dice. But get it right, and you’ve got peace of mind. Whether you’re a facility manager or a contractor, these steps can make all the difference in optimal fire system performance. And hey, in this line of work, that’s what counts. Staying ahead of problems before they start.
FAQs
How often should I test and maintain check valves for optimal fire system performance?
It varies by setup, but aim for visual checks monthly, full operational tests quarterly, and a deep dive annually. In high-risk spots like chemical plants, bump it up—I’ve seen monthly tests catch issues early and avoid big headaches.
What signs show my check valve needs maintenance?
Watch for leaks, unusual noises during flow, or pressure drops. If water backs up or the system feels sluggish, that’s a red flag. Testing regularly helps spot these before they mess with optimal fire system performance.
Can I test check valves myself, or do I need a pro?
Basic visuals? Sure, DIY it. But for pressure and flow tests, call in certified techs to ensure accuracy. Messing up could void warranties or worse—I’ve heard stories of DIY gone wrong leading to system failures.
What’s the cost impact of skipping check valve maintenance?
Big time. A failed valve might mean thousands in repairs or downtime. Regular test and maintain check valves keeps things cheap in the long run, boosting optimal fire system performance and cutting emergency fixes.
Are there specific standards for check valves in fire systems?
Yeah, look for FM or UL listings—they ensure the valve can handle fire scenarios. Materials like carbon steel or galvanized finishes help too, depending on your environment.